If you've been growing tomatoes for many years, you probably know about blossom end rot and it may be one of the most important critical components in the existence of your tomato garden. Well in this article, am going to show you three ways that you can prevent blossom end rot from ever occurring so you never have to worry about it in your tomato garden again.
What Is Blossom End Rot?
Blossom end rot is one of the most common problems that gardeners have in their tomato gardens and blossom end rot presents itself as an ugly unsightly black spot at the blossom end bottom of the tomato fruit. They will grow as the tomato fruit grows and generally destroy the fruit and make them inedible.
Causes Of Blossom End Rot
According to the Wisconsin horticultural extension, blossom end rot is caused by a lack of calcium in the fruit, and why this calcium may be due to low calcium levels in the soil, more often there is plenty of calcium in the soil but it's availability for uptake and transport to fruits is impaired.
Drought stress, alternating soil moisture extremes, and damage to plant roots can all inhibit calcium uptake as well as waterlogged or cold soils and high concentrations of ammonium (NH4+), potassium (K+), and magnesium (Mg++) cations in the soil.
So what does this mean? Well, it means that while it is possible that you have a calcium deficiency in your soil that is causing the blossom end rot, you probably don't because most soils have more than enough trace calcium for the plants. In most instances, it's probably caused by a transpiration issue, the ability of a plant to uptake water because calcium is water soluble.
So, if your tomato plants are suffering due to poor soil moisture regulations, that is most certainly your problem. I'm going to show you exactly what you can do to prevent this from ever happening, so blossom end rot will never present itself in your garden ever again.
1. ORGANIC FERTILIZERS
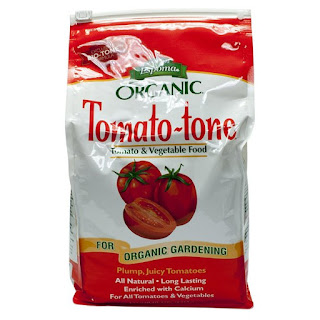
Always plant your tomato plant alongside a good organic fertilizer, anything around the 5-5-5 will do, the organic fertilizer above is specifically formulated for tomatoes and it has a rich bone meal component which is rich in calcium and that calcium will help fortify the soil, so you do not encounter a blossom end rot issue.
Here is why this is important, I have noticed that it has become increasingly popular over the past couple of years to not use fertilizers in your garden, people don't want to spend the money or they don't want to buy fertilizers for whatever reason and it's become very popular to just use things like grass clippings, free mulch, compost and things like that, and that can be a problem because if you're just using compost and you're just using different types of mulch, while that will give you the nutrients you need to grow things, you don't know what type of microbes you're getting by doing that.
So, if you're outsourcing compost, try to know exactly what was put in the compost. If you're not fortifying it with ingredients rich in calcium, your compost may not have much if any calcium at all.
If you're serious about growing tomatoes, I really recommend that you go out and you get yourself a good organic fertilizer.
I like to plant my tomato plants with two tablespoons of organic fertilizer in the planting hole and then every two to three weeks, I like to top dress with another one to two tablespoons.
I like to use the little green miracle grow scoopers which are one-and-a-half tablespoons, simply top-dress your soil by sprinkling it around and then work it into the top inch of the soil with your fingertips and then water it well.
However, I do have a secret ingredient that is even better and that will help prevent blossom end rot, that secret ingredient is bone meal.
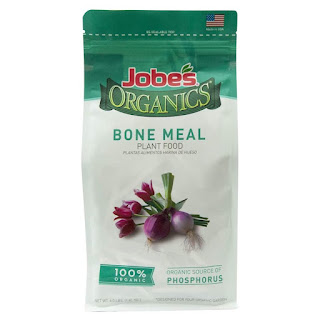
Like the title says, it is made out of bones and it is very rich in phosphorus and calcium. When I plant all of my nightshades, like my tomatoes and pepper, even bulbing plants and pretty much everything including fruit trees.
I always like to dust the roots with bone meal and then every two to three weeks or so I like to go around and then just dust the top of the soil and work it into the top inch as well.
This is a very rich source of calcium, it has been grinded into some sort of powder, so it does break down pretty quickly, because of that, it will immediately start feeding your plants and it will last a long time in your soil as well.
However, I do recommend that you go out and get yourself a bag as an insurance policy. It is also awesome for fruit trees because it's so high in phosphorous, it will help increase fruit production.
You will get more blooms on your tomato plant when you include bone meals regularly.
As previously said, it is a component that is already inside the organic fertilizer, however, I do find that a little bit extra does show benefits.
As I mentioned from the Wisconsin horticultural extension, usually the problem is not a deficiency of calcium in your soil but instead, the blossom end rot is caused by uneven watering practices.
If your watering practices are uneven meaning your soil gets too dry, and then it gets way too wet, and it doesn't maintain a consistent level of moisture, you will have issues with the plant itself uptaking water from the soil and that will lead to the calcium deficiency because the calcium is a water-soluble nutrient, it takes it up with the water in the soil.
If your plant is not performing adequately with transpiration, you will get a calcium deficiency.
2. ADD A THICK MULCH LAYER TO REGULATE SOIL MOISTURE
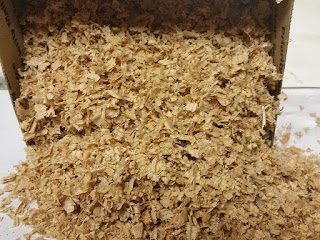
This number two tip is critical and is one of the biggest things you can do to prevent blossom end rot, and that is to include a good thick mulch layer around all of your tomato plants. To do that, I like using an all-natural hardwood bark mulch. These double or triple-shredded hardwood bark mulches are excellent because not only do they protect the soil from the UV rays of the sun, but they also help prevent evaporation.
I recommend a two to three-inch thick layer of a natural mulch around all of your tomato plant. That will help prevent the evaporation and help maintain even levels of moisture.
If you don't want to use a hardwood bark mulch, you can use pine bark nuggets, or you can use herbicide-free and generally a weed-free straw. You can also use cypress mulch, cedar mulch, and you can use anything but dyed mulch or rubber mulch or things like that.
Just make sure the mulch you're using are natural mulch, you can even use weed-free grass clippings, the idea is to just protect the top level of your soil from the sun so it does not bake and evaporate too quickly.
You will also get other benefits from the mulch layer, it will decompose and add organic matter back to the soil which the worms, fungi and other beneficial bacterial all love. It will also prevent the soil from splashing all over the undersides of your leaves during rainfall which is the best way to contract diseases.
So, it's an all-around wonderful thing to do and it's probably the best thing you can do to regulate your soil moisture which is key to preventing blossom end rot.
3. WATER YOUR PLANTS VIA DRIP IRRIGATION
Take the time to install drip irrigation in your garden, that is because drip irrigation will provide some of the best protection against blossom end rot due to even deep watering.
If you simply come around with hose and you water the top of your tomato plants, all you're doing is shallow watering the top inch or two of the soil.
It will not penetrate and if you're having a dry spell and its been very hot, your soil may become very hard. If you use a watering wand or a garden hose, the water may just run off away from the plant and not penetrate the soil well at all.
When the drippers are on, they drip in the same spot and that penetrates very deeply into the soil, it goes down multiple inches. When the sun is baking the top inch or two of the soil, this water is protected because it goes much deeper than typical overhead watering.
When you add drip irrigation with a mulch layer, you're getting awesome benefits because you're getting extra deep watering and then you're getting protection against evaporation from the sun as well.
Using these three things, the fertilizer, bone meal, mulch, and drip irrigation, I haven't had an issue with blossom end rot in many years, my garden is basically free of it.
However, If you have a much smaller garden and you're not going to be able to run drip irrigation for whatever reason or maybe you have a container garden that is not realistic, I have a little solution for you.
For whatever reason drip irrigation is not realistic for you at this time, you can make your own free drip irrigation using old used milk jug or water jug and all you have to do is to fill it up with water and then take something like strong needle and just poke it into the side.
That will drip irrigate your garden, and the cool thing is, not only will this irrigate your garden better but the slow drip will penetrate the soil better than fast overhead watering.
You can also mix soluble fertilizers in it, if you like to use miracle grow, you can put that inside, if you're solely organic and you want to put fish emulsion inside, you can use it too, whatever you prefer, you can do it with this method.
It will take about an hour to drain, I have used this method in container garden as it may be difficult to run drip lines to it. So, this is a good hack that you can make if you don't want to pay or you don't have the time to install drip irrigation at this point.
While these three things will dramatically reduce the prevalence of blossom end rot in your garden, nothing is hundred percent efficient, you can't control the weather, you can't control drought, you can't control searing heat and you can't control deluge rainfall.
Sometimes no matter what you do, you still will get a few instances of blossom end rot in your garden.
It's worth mentioning that perhaps some varieties are just more susceptible to blossom end rot than others, so if it does occur make sure to use either of the three tricks mentioned above.
If you're doing all these three things discussed above and you're still finding an occasional instance of blossom end rot here and there in your garden, especially in the first fruit of the season, don't necessary panic because that may not be indicative of a problem.
For whatever reason, blossom end rot tends to be most prevalent on the first few fruits that form on the tomato, and that's probably because they form early in the year before the plants are truly well established. Those first few fruits are probably the most susceptible to stress problems.
Usually, blossom end rot stops once the plant gets established and the later fruit clusters start getting larger. So, if you see a few problems here and there, right at the get-go, don't necessarily panic because the plants tend to grow themselves out of it as long as you are maintaining the course and you're doing all the things I outlined in this article.
Just stay the course and the problem will likely regulate itself as long as you're maintaining proper soil moisture and adequate nutrients.
So I hope you found this article helpful, if you did please share and leave a comment down below. Also, check out our amazon storefront for products we use regularly in our garden.


No comments:
Post a Comment